
Step-by-step instructions for setting up NFC cards using our BTCPay Server
Step 1: Request Access to BTCPay Server
- Register your account by visiting https://pay.btckasi.com/register. Fill in the form with you email address and a unique password.
- After clicking on “Create Account,” email slu@bitcoinekasi.com and ask to have your account approved.

Step 2: Sign In and Create a Store
- Follow the personal link and use your email and password from Step 1 to sign in.
- Click “Create” to set up a new store.
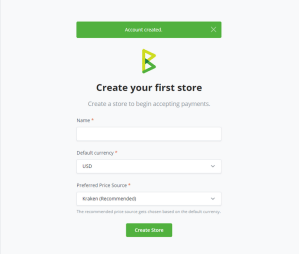
- Name your store anything you like and set your default currency. (SATS is easiest) It does not matter what you name it.
- Then click “Create Store.”
Step 3: Enable Lightning Payments
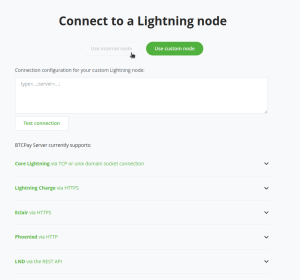
- Click on “Set up a Lightning node.” The page will redirect you to connect to a Lightning node.
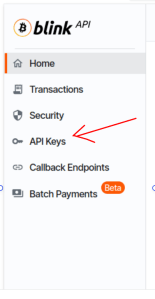
- In a separate window, go to: https://dashboard.blink.sv and create or login to your Blink account.
- Once logged in, go to the the left toolbar and click “API Keys.”
- On the right side, click the small blue “+” button.
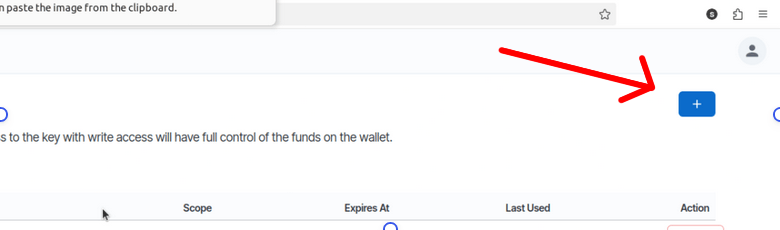
- Create an API name and press “Create.”
- Copy the string shown titled “BTCPay connection string BTC Wallet”.
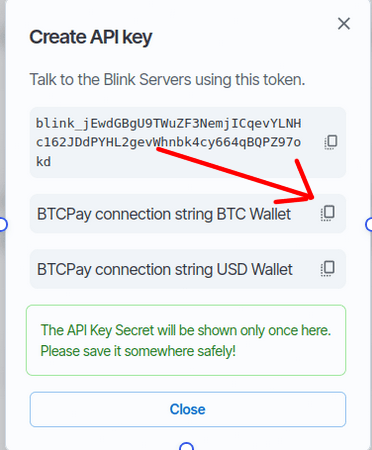
- Go back to your BTC Pay Server instance.
- Paste the copied API key into the “Connection Configuration” field, then save and refresh the page. Your Lightning payment option should now be active.
Setting up/programming a Bolt Card
Step 4 : Set Up Bolt Factory
- From the menu on the left, click on “Boltcard Factories.”
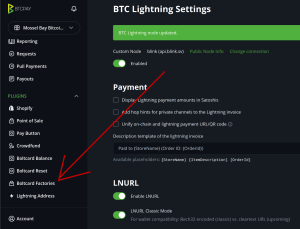
- Enter your name (or app name) and click “Create” on the left screen. You may use whatever name you like here. It does not matter what you name it.
- Enable lightning automated payment processor by clicking the green link in the yellow button.
- Set the desired spending limit for your card and default currency (SATS is easiest), then click “Save.”
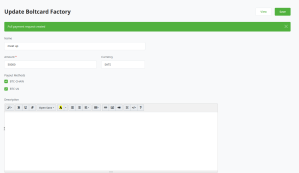
Step 5 : Program Your NFC Card
- On your phone, install the Bolt Card Factories app from the Play Store, Apple App Store, or from:
https://play.google.com/store/apps/details?id=com.lightningnfcapp
Note: This link will only work using Google Chrome browser. - Go back to BTCPay Server and click “View” from the “Update Boltcard Factory” page.
- Click “Setup” and follow the instructions to switch apps.
- Hold the NFC card to your phone until it is programmed. All check marks should turn green. (Make sure that your phone has NFC support enabled.)
Step 6: Check Balance and Top Up the Card
- In the left sidebar menu, click on “Boltcard Balance.”

- Hold your NFC card up to your phone.
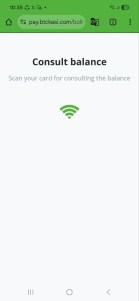
- Click on the QR code symbol to check your balance. (This may not work with certain iPhone models, such users will need to retrieve the QR code from an alternative wallet.)
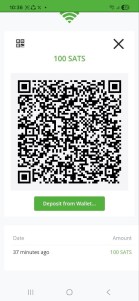
- You can also top up the card by scanning the same QR code and sending sats or clicking “Deposit from Wallet.”
- Congratulations! You now have setup a functional bitcoin payment card.
The following videos feature our students and others across the country using their NFC cards.